
For users to access a volume and archive data on it, a share must be provided for the volume using the SMB/CIFS or NFS protocol. Shares can be added, configured, and deleted in the Administration menu. Double-clicking an existing share in the Manage Shares overview allows you to edit it.

Adding an SMB share
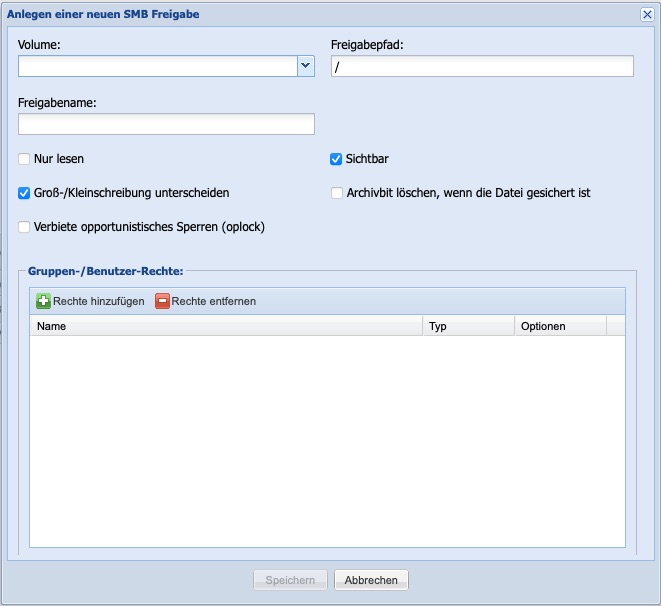
Clicking the Add SMB Share button in the Manage Shares window opens the dialog box for adding a new SMB share.
First, a volume must be assigned to an SMB/CIFS share. A drop-down menu is available for this purpose, showing all volumes already created. The share can be further refined by specifying a specific share path. If the share path field is left blank, the entire volume is shared. Each share requires a unique share name for identification. Entering spaces and certain special characters is not permitted here.
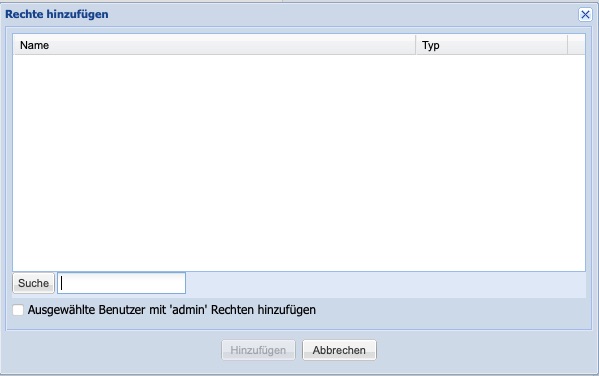
If only individual users or groups are to be given access, the Public option must be disabled (default = on). In this case, the Search button then becomes selectable. Depending on whether an Active Directory directory service has been set up (see chapter 6.6) or not, clicking the Search button displays either the users or groups from the directory service, or the internally created users. To grant the selected users or groups access to the share, they must be added to the list using the Add button.
If you enable the Add selected users with 'admin' rights button when adding users, these users will receive administrative file system permissions for all created files and folders when accessing the share.
If the share is to allow read-only access, the Read only option must be enabled (default = off). If the share is not to be visible on the network, the Visible option must be disabled (default = on). Verification that archiving has taken place can be performed using the Clear archive bit when file is backed up option.
In exceptional cases, it may also be necessary for certain applications to disable opportunistic locking altogether. Please refer to the corresponding integration documentation to determine whether your application requires this setting.
Adding an NFS share
Clicking the Add NFS Share button in the Manage Shares window opens the dialog box for adding a new NFS share. The Silent Cube storage system currently supports version 3 of the NFS protocol.
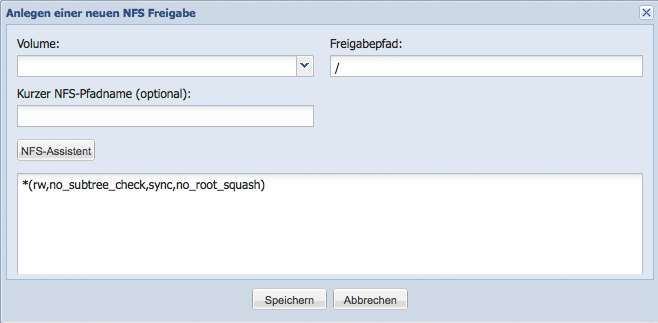
First, a volume must be assigned to an NFS share. A drop-down menu is available for this purpose, showing all volumes already created. The share can be further refined by specifying a specific share path. If the share path field is left blank, the entire volume is shared.
For some Unix or AS/400 systems, it may be necessary to shorten the NFS path of the Silent Cubes storage system. The optional Short NFS path name field is available for this purpose.
In the lower input field, the options for the NFS share can be defined manually. Manual entry is only recommended for experienced administrators. Alternatively, the NFS wizard can be used to configure the options via a dialog box.
An NFS share can be defined for all IP addresses, a single IP address, or a subnet. In addition, the access rights can be restricted. Since Mac OS X attempts to use ports that are not intended for NFS connections under Linux, the Allow access from Mac OS X option must be enabled if Apple computers are to have access to the share.
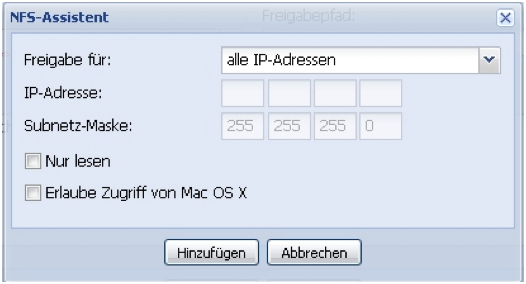
By default, an NFS share with options is already defined (all IP addresses, with read and write permissions, without Mac OS X support). If this default share is not desired, the entry can be selected and deleted.
Adding an SCP share
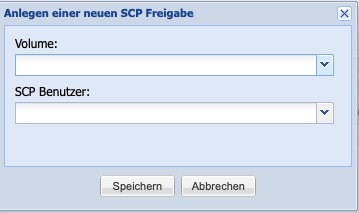
Clicking the Add SCP Share button in the Manage Shares window opens the dialog box for adding a new SCP share. SCP shares always apply to the entire volume and are valid for a selected user of the SCP only user group.
Accessing shares under Windows, Linux, and Mac OS X
Accessing shares under Windows
Under Windows, an SMB/CIFS share created in the Silent Cubes software is mapped as a network resource. The IP address of the Head Unit is specified as follows:
\\IP-address Head Unit\
Shared subdirectories of the volume are then automatically displayed in the wizard and can be selected (for more information on network environment and adding a network resource, see Windows Help).
Note that both a username and a password are required to access the share. The username must also always be specified together with the corresponding domain. If the Silent Cube system is not connected to a domain, the hostname of the Silent Cube system is used as the domain.
Accessing shares under Linux
NFS shares
NFS shares can be mounted under Linux via the console as follows:
mount -t nfs IP-address:/share/ /local_directory
SMB/CIFS shares
SMB/CIFS shares can be mounted under Linux via the console as follows:
mount -t smbfs //IP-address/share/ /local_directory
If access to the share requires a username, the command line must be extended as follows:
mount -t smbfs -o username=username//IP-address/share/ /local_directory
If the password is to be transmitted at the same time, the command line must be extended as follows:
mount -t smbfs -o username=username, password=password//IP-address/share/ /local_directory
Accessing shares under Mac OS X
Under Mac OS X, both Finder and Terminal can be used to access SMB/CIFS shares. If Terminal is used, access is performed at the command-line level, as under Linux. The Finder in Mac OS X has the menu entry Go » Connect to Server (shortcut: ⌘ + K).
The server address to enter is:
smb://IP-address
All available volumes are then displayed. After selecting the desired volume, you will be prompted for the username and password.
Editing a share
By double-clicking an existing share in the Manage Shares overview, you can edit it.
Removing a share
In the Manage Shares overview, you can delete a share. To do this, a share must first be selected. The selected shares can then be deleted using the Delete selected shares button.